Wednesday 22 June 2011

What does one do with kale anyway?


So in our food box last week we got kale.  Being home on maternity leave has allowed me time to watch thrilling day time tv shows like Dr. Oz, who has eyebrows that scare me... just a little.  Anyway, Dr. Oz who is apparently an expert on everything talks a lot about kale.  I'm not sure what he says exactly because I don't really listen that closely but apparently it is a super food or something. I suppose if a food is considered "super" I should probably be trying to eat more of it.

Needless to say, I have never tasted kale before, let alone tried to cook it in something.  So I did a google search and came up with a recipe for Kale and White Bean Soup.

I will apologize for my lack of pictures... Lila was having a very fussy kind of day and I was really working hard to get this soup going and keep her entertained.

I pretty much followed the recipe as it is.  I heated some oil in the stock pot.  I chopped up some yellow onion, one of our giant carrots and some garlic and tossed that in. I let it simmer for a few minutes to soften it up.  Then I chopped up the kale and threw that in the pot, letting it cook until it was wilted.  I also chopped up some green onion that I needed to use up and grabbed some garlic chives, garden chives and basil from my herb garden (which is doing very well, thanks for asking!).  I let this all simmer together for a few minutes so the flavors could mix and mingle. I dumped in some chicken stock and some of the beans (I used canned white navy beans).  Then I blended up the remaining beans and chicken stock and dumped that in with the veggies.  I diced up two tomatoes and tossed those in the pot. Then I added the italian seasoning and also some garlic plus, because I love garlic plus and add it to almost everything I cook!

I made a salad with fresh mixed greens, cucumber, strawberries and sesame seeds.  I also bought some fresh bread from our local farmers market and even dug out some real butter for it!  Dinner was delicious and nutritious!


Lila enjoyed it.  I think she especially enjoyed peeling the kale off of her belly and eating it!

This soup was okay.  It tasted like something was missing but I'm not sure what. Maybe it needed some more garlic plus?  The texture was a little strange as well, probably due to the pureed beans that were meant to thicken the soup but kind of just made it feel a little chalky.  All in all I thought this soup was just okay and I probably wouldn't make it again.  Luckily there was no kale in this weeks box so I won't have to find a new recipe for the time being!

Tuesday 21 June 2011

Beet green and spinach lasagna

J and I recently signed up for a share in a local CSA (Community Shared Agriculture) at TapRoot Farms.  Basically, they (in conjunction with other local farms) grow the produce and then deliver it to share holders in the province each week.  I am so excited to do this!  I'm all about buying local and eating fruits and veggies that are in season.  Mostly I am excited because they bring things like kale and nettle and beet greens in the boxes, things that I would never purchase at the grocery store.

Last week in our food box we got:
Kale
Salad Greens
Beet Greens
Green onions
Cilantro
Carrots
Cucumber
Strawberries
Apples
Sweet Relish Preserve

I think that is it.... so many delicious fruits and veggies!!! I have to admit, I had no idea what to do with beet greens or kale so I did what all inquiring minds do, a google search!  I found some promising looking recipes but decided that because beet greens cook up much like spinach I would use it in a lasagna!  Who doesn't love lasagna?

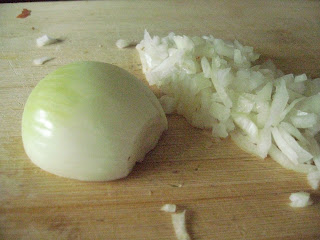
So I chopped up some onion.

And some spinach that I had in the fridge.

 Then the beet greens.  So pretty with their purple veins!

Garlic.  Must have garlic.

Zucchini.

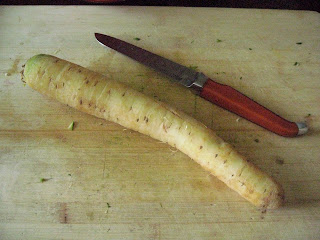
Then I decided to grate up one of the giant carrots that came in our box. These things are huge and white and weird.  But they taste just like regular carrots, maybe even a little sweeter!

Mushrooms.  I bought the pre-cut kind because I am lazy and they were on sale.

I chopped up all the veggies (except the carrot) and tossed them into a pan with some olive oil to soften them up.

Look at all those veggies!  Sorry for the weird picture quality. I have been playing with the settings on my camera and can't quite get them right.  I'm hoping for a new camera for Christmas..... we'll be starting a collection to pay for it soon! All donations are welcome ;)

I browned up some hamburger, not too much because I didn't want the lasagna to be too meaty.  Just meaty enough to satisfy J, the carnivore of the household.  

Again, being lazy, I used bottled sauce, I used the PC kind (which was on sale).  I like it.  In fact I don't think I have yet met a PC product I didn't like.  Maybe if we end up with a bunch of tomatoes in our TapRoot boxes later in the summer I will make a huge batch of sauce for freezing, but for now, the bottled stuff works! I also used the Catelli Express noodles that are oven ready instead of pre-bowling the regular ones.

Cheese. I used mozzarella and cottage cheese this time but I have been known to use ricotta, marble, cheddar, do what you like!

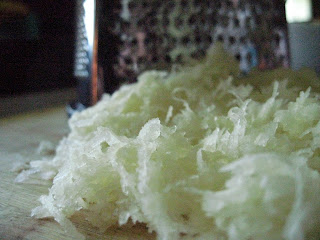
And I grated the carrot to add as a layer.

I'm sure there are not many individuals out there who don't know how to make a lasagna but for anyone who may not, this is what I did.

1. Put a layer of noodles in the the bottom of the pan.
2. Put a layer of meat sauce on the noodles.
3. Put a layer of veggies on the the sauce.
4. Put a layer of grated carrots on the veggies.
5. Cover with cheese.

It really doesn't matter what order you do this in.  It could be meat, noodles, carrots, veggies, cheese. It could be veggies, meat, carrots, cheese noodles, really, go with your heart on this one!  Then repeat until the pan is full.  I only got two layers in mine.  I filled two square pans. I made one for eating now and then cut the other one up and froze meal sized pieces for future lunches.

I was nervous about the beet greens, I'll be honest.  But they tasted just like the spinach.


Though Lila is not smiling in this picture, she really liked this dish.  She actually ate two pieces in one sitting and didn't feed any of it to the dog! We all liked it actually.  Veggies, meat, cheese, how can you go wrong?

Wednesday 15 June 2011

Hanging herb garden


I have been wanting to plant this herb garden since I saw the idea in the book Grow Organic.  I have been searching for the perfect hanging shoe rack for over a year.  I had finally resigned myself to the fact that I was never going to find what I was looking for and had actually started to make one out of burlap.  Then I happened to wander into a Dollarama to buy clothes pins the other day and found one!  I was so excited.  Its the small things really.  

It seems like it has been raining for months on end so the other morning there was a break in the raindrops.  It was still super damp and cold but we braved the conditions to get this project done.  Lila put a cozy sweater on over her sleeper for the occasion. 


J was concerned about the moisture being against the house if we hung it on the exterior wall so he put some "house wrap"or "tyvek" on a board and then stapled the shoe rack on top of it to prevent any moisture building up on the house. Probably an unnecessary precaution but netter safe than sorry!


We got ourselves organized and brought out the transplants, seeds, soil and a pitcher of water (which Lila promptly kicked over). Resulting in an empty pitcher and wet feet for both of us.


I re-filled the jug and poured some water into one of the pockets to see how good the drainage would be.


  The water wasn't draining very well so I poked some holes in each pocket with a knife.


 Once the holes were punched I filled each pocket half full with potting soil.


 Then I popped in the transplants and seeds.  We planted cilantro, garlic chives, garden chives, winter savory, spicy basil, regular basil, thyme, dill and mint transplants.  We also planted nasturtiums, spinach and leaf lettuce seeds.

I love it.  J attached it to the side of the house when he got home and it looks great!  So worth waiting for and I cant wait to use these herbs and veggies in my cooking this summer!


The day I should have stayed in bed....

It is raining, again.

I woke up around 6:00am to the sound of retching.  No, not J and his post-nasal drip (eew) but the dog. On our bed. Throwing up.  Gross.

So I climbed out of bed, stripped it down and threw the sheets and duvet in the washing machine. I put the dog out, waited for her to eat some grass to completely clean out her system and then let her in. I promptly climbed back into bed, got all snuggled in, relaxed and Lila woke up.  So we were up for the day.

Lila hadn't slept well the night before.  She has teeth coming in I think.  But I have been saying that for months and she still doesn't have any teeth pushed through yet.  So we started out the day early and cranky.

I decided that I was going to make some mini muffins for Miss Lila.  I am finding it hard to get lunch for her when we go out.  When we were just nursing it was easy because the milk was always with us, one of the MANY benefits of breast feeding.  However, now that I am giving Lila three meals a day in addition to her nursing sessions I have to be able to take easy finger foods with me when we go out during the day.

I did some google searching and found a recipe for carrot and cranberry muffins. I found this recipe and decided to make these (I used half as much sugar as the recipe called for), mostly because they have yogurt in them which is my new favorite ingredient in baked goods.  I decided that I would make my life easier by using our Magic Bullet to blend up the carrots instead of grating them by hand.  But I forgot that our Magic Bullet never works like I want it to. I also didn't realize that Lila would be completely terrified of the noise.  So I threw the carrots in and attempted to shred them up.  Attempted.  What I ended up with was carrot mush with huge chunks.  After about 30 minutes of alternately grinding carrots and soothing Lila I ended up with very smushy carrot puree with chunks in it.  I gave up and threw it in the muffin batter anyway.  So I ended up with cranberry and carrot chunk muffins.  Lila doesn't seem to care though and she has devoured a bunch of these little delights, chunky or not.

To make myself feel better I decided to make some Big Chocolate Chip Cookies (my favorite recipe so far).  I of course proceeded to burn 3/4 of them.

So Lila and I retired to the living room to relax after cleaning up the kitchen.  Bailey (our dog) was feeling much better by then and decided she was ready to play.  I have been on a de-cluttering spree and have been packing up stuff to put in storage or give away to the church yard sale.  I had filled a big box with mugs that we never use that were just taking up precious real estate in our kitchen.  I had placed said box near the top of our stairs for J to take down to the crawl space when he got home.  Clearly I wasn't thinking or maybe the exhaustion from no sleep and getting up early had gotten to me, or maybe it was the frustration with the muffins and cookies but I took Bailey's toy that she was persistently pressing into my lap and threw it for all I was worth.

I heard the claws on the box first, then the slide and then smash, smash, smash, all the way to the bottom of the stairs.  I jumped up to look.  Poor Bailey stood at the bottom of the stairs surrounded by shards of glass and mug handles with her toy in her mouth. She had managed to break every single mug in the box.

I assisted Bailey in navigating the glass mine field and we snuggled up on the sofa for the rest of the day (30 minutes) until J came home to rescue my sanity.

Thank you for listening to the story of the day I should have stayed in bed.  Hopefully tomorrow will be better.

Saturday 4 June 2011

Baker's Best Chocolate Chip Cookies

I decided to bake some chocolate chip cookies tonight... shocking, I know. I think I was starting to crave them and my pants are starting to feel a little looser.  The last recipe I made, the Big Chocolate Chip cookies were delicious, best I have ever tasted and I was very tempted to just make them again but I knew I had to continue on the quest just incase there really is a better recipe out there.

So I did a good old fashioned google search and came up with all kinds of cookies that looked flat and boring.  These, "Baker's Best Chocolate Chip Cookies" looked like they had potential.  I have to admit my heart wasn't totally in it. Lila was feeling a little miserable today, I think she has some teeth coming, of course I have thought that for the past three months and so far, none.  So I was running back and forth between trying to entertain her and make the cookies which resulted in one pan of under-cooked cookies and two pans of over-cooked cookies and two pans of just right cookies. These ones were just right.


I have developed a rating scale for the cookies that I think encompasses all that is wonderful about chocolate chip cookies, according to me.  The scale is from 1 - 5. 1 being not good and 5 being excellent.  So for this recipe (based on the two pans that cooked the way they were supposed to!):

Chewy Inside - 4
Crispy Outside - 4
Amount of chocolate being just right (not too much and not too little) - 4
Sweet to salt ratio - 2 
Just out of the oven taste - 3
Next day taste - to be determined
Ease of recipe - 5
Am I missing anything here?  Is there anything else I should be rating?


I like this recipe but it feels like there is something missing.  Maybe it is because there is no salt in it and as you know I like a little salt in my cookies.  Overall, good but not as good as the Big Chocolate Chip Cookies.

Recipe:
1 cup butter, softened
1 cup packed brown sugar
1/2 cup granulated sugar
2 eggs
2 tsp. vanilla
2-1/4 cups flour
1 tsp. baking soda
1 pkg. (300 g) Baker's Semi-Sweet Chocolate Chips

HEAT oven to 375°F.
BEAT butter, sugars, eggs and vanilla in large bowl until light and fluffy. Stir in flour and baking soda until well blended. Add chocolate chips; mix well.
DROP tablespoonfuls of dough, 2 inches apart, onto baking sheets.
BAKE 10 to 12 min. or until lightly browned. Cool on baking sheet 3 min. Remove to wire racks; cool completely.

Friday 3 June 2011

Rhubarb

You may remember in one of my very first posts there was a picture of a box of rhubarb plants that my mother had dug up from her garden for me to plant.  I don't yet have a vegetable garden established at our house so this rhubarb will be the beginnings!  

Here the plants are.... still in the box.  Good thing these are hardy!

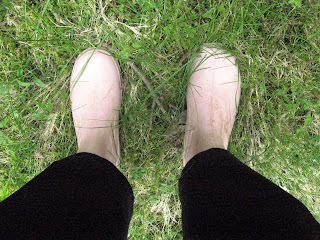
I put on my special gardening/frog catching boots.  Nice aren't they?

Lila and I wandered the perimeter of the yard (we're starting to learn math language at an early age), to find the perfect spot to put the rhubarb.  J doesn't want anything against the house because he says it promotes mold growth.  I'm not sure that would really happen but I took his word for it. We found a good spot along the side of the house that gets lots of sunlight but is tucked away off the lawn so that J doesn't accidentally mow over it with his ride on tractor.

Lila got comfy in her bumbo chair.

I took a picture of her foot, because she has really cute feet!

Then I started digging.  I think I chose the rock graveyard because I continuously dug up rock after rock after rock.  But finally I was ready to put the plants in the ground.


I dumped some water on them and covered them over with soil.  

 Lila supervised the whole process and made sure to keep an eye on Bailey as well.  Plus she was busy being Batman.

I can't wait until I can make lost and lots of rhubarb desserts next year when the rhubarb is ready for harvesting!  Next gardening project - the hanging herb garden!

Mmmmmuffins!

So I decided to get a break from my cookie baking and attempt to make something a little healthier, muffins!  Unfortunately I couldn't find my camera for a few days and therefore missed photographing any of the muffin making, but all of these recipes came from the blog How Sweet It Is. So this might be a little boring but if you are interested in muffins, read on!

First I made Oatmeal Chocolate Chip Cookie Muffins.  At least they had the words "chocolate chip cookie" in them so it wasn't a huge jump from what I have been spending my days making (and eating). They do taste a bit like cookies, but I felt much less guilty about eating them.

Then I decided to attempt to be even healthier and I made Very Berry Whole Wheat Muffins. I just used the PC Very Berry frozen fruit mixture that I had in the freezer and I also skipped the sugar on top of the muffins.  These muffins were a little too "wheaty" for me.  Have you ever gotten the whole wheat bread at Subway and noticed how strongly whole wheaty it tastes? Almost overpowering?  That is what these remind me of.  They were good but I'm not sure I would make them again, maybe with half whole wheat flour and half white.... we'll see.

Finally I made Whole Wheat Banana Blueberry Muffins.  These muffins have very little sugar in them, no eggs and no oil.  They are almost as healthy as you can get in terms of baked goods.  Most importantly, these are delicious!  Super moist and tasty! However, I am still very partial to the banana and chocolate combination so I will likely be reserving most of my over-ripe bananas for something involving chocolate chips!


Oatmeal Chocolate Chip Cookie Muffins
makes 12 muffins
1 cup whole wheat pastry flour (or all-purpose)
1 cup rolled oats
1 teaspoon baking soda
1/4 teaspoon salt
1/2 teaspoon cinnamon
1/3 cup brown sugar
1 egg
1/4 cup butter, at room temperature
1 1/2 teaspoons vanilla extract
1 cup milk (any kind will do)
1 cup chocolate chips
Preheat oven to 350.
Add oats to a bowl and add 1/2 cup of milk. Let soak for 5-10 minutes, while you prepare the first few steps of the muffins.
In a large bowl, combine egg and brown sugar and whisk until smooth and caramel in color. Add in vanilla and butter, whisking well. Try to smooth the batter as much as possible – there still may be some small butter chunks. Add flour, oat mixture, baking soda, salt and cinnamon and mix. Add remaining milk and combine until smooth. Fold in chocolate chips.
Line a muffin tin with lines and pour about 1/4 cup batter into each line. Sprinkle the tops with raw turbinado sugar. Bake for 15-18 minutes, or until cooked through. Serve with butter!
Very Berry Whole Wheat Muffins
1 1/2 cups whole wheat flour
1/2 cup sugar
2 teaspoons baking powder
1/3 cup canola oil
1 egg
1/2 cup strawberries, chopped
1/2 cup blueberries
1/4-1/2 cup milk
1 teaspoon vanilla extract
2 tablespoons raw turbinado sugar
Preheat oven to 400.
Mix flour, sugar, and baking powder in a large bowl. Add canola oil, 1/4 cup milk, vanilla, and eggs, and mix until combined. If your dough is very thick, add the rest of the milk. Fold in blueberries and strawberries. Top with a sprinkling of raw turbinado sugar.
Bake for 15-20 minutes or until golden brown.
Whole Wheat Blueberry Banana Bread Muffins
2 cups whole wheat flour
1/3 cup sugar
1 egg
1/2 cup unsweetened applesauce
1/2 teaspoon salt
1 teaspoon baking soda
1 teaspoon vanilla extract
4 ripe bananas, mashed
1/2 cup blueberries
Preheat oven to 350 degrees. Place muffin cups in muffin tins.
Mix sugar, applesauce, and egg until creamy and light yellow. Add bananas and vanilla. Add flour, baking soda, and salt. Stir until completely smooth. Fold in blueberries. Spoon the batter into the muffin tins. Top with course sugar.
Bake for 20-25 minutes, until toothpick poked in center muffin comes out clean.